Google: OAuth Consent Screen - One time step before you can create client-id/client-secret
Before you set up your first Google OAuth application, you need to:
- First: Create a Google Developer Project
- Second: Configure the Google OAuth consent screen, described below.
How to configure the OAuth Consent Screen
-
Navigate to https://console.cloud.google.com/. The upper left hand corner of the page should look like this:

-
Make sure the project showing (
cmpsc156-s23in the example) is the one you want to work with. If not, click on the dropdown and select the correct project. If you don’t have a project, clickNew Projectand follow the instructions here to create one. -
Use the so-called “hamburger menu” (the icon with three vertical lines like this ☰) to reveal these menus, and select
APIs & Services / OAuth consent screen.
-
Now you are ready to start filling in the information for the OAuth Consent Screen, as explained below.
What is the OAuth Consent Screen?
The idea is that when your application authenticates using Google OAuth OAuth, it will share certain information/permissions with the application; at a minimum, your name and Google email address.
Before Google allows this, it wants to be sure that you give your permission.
For this reason, you need to configure what will be shown to the user when this happens.
What information am I asked for when configuring the OAuth Consent Screen?
You will only need to fill this in once for the project; you may be able to get away with filling this in just once for the entire course (unless you run into some limit on the number of apps you can create in your project.)
Fill in these values on the screen that appears. Use the name of the course and the quarter, and fill in your UCSB email:
On this screen, click External, then Next:
Fill in your UCSB email where it says: Contact information
Then click “Next”, and agree to the Google API services policy before clicking “continue” and “create”.
After you click Create, you can set up Scopes.
What are Scopes?
Scopes are various kinds of permission that you give to the app to work with your Google data. The minimum is typically the ability to see your Google email address, and some basic information about you as a user. Other examples (which we will not show at the moment) might include the ability to work with you Google Calendar, Google Docs, GMail, etc.
To access the scopes, select the Data Access tab on the left side of the screen.
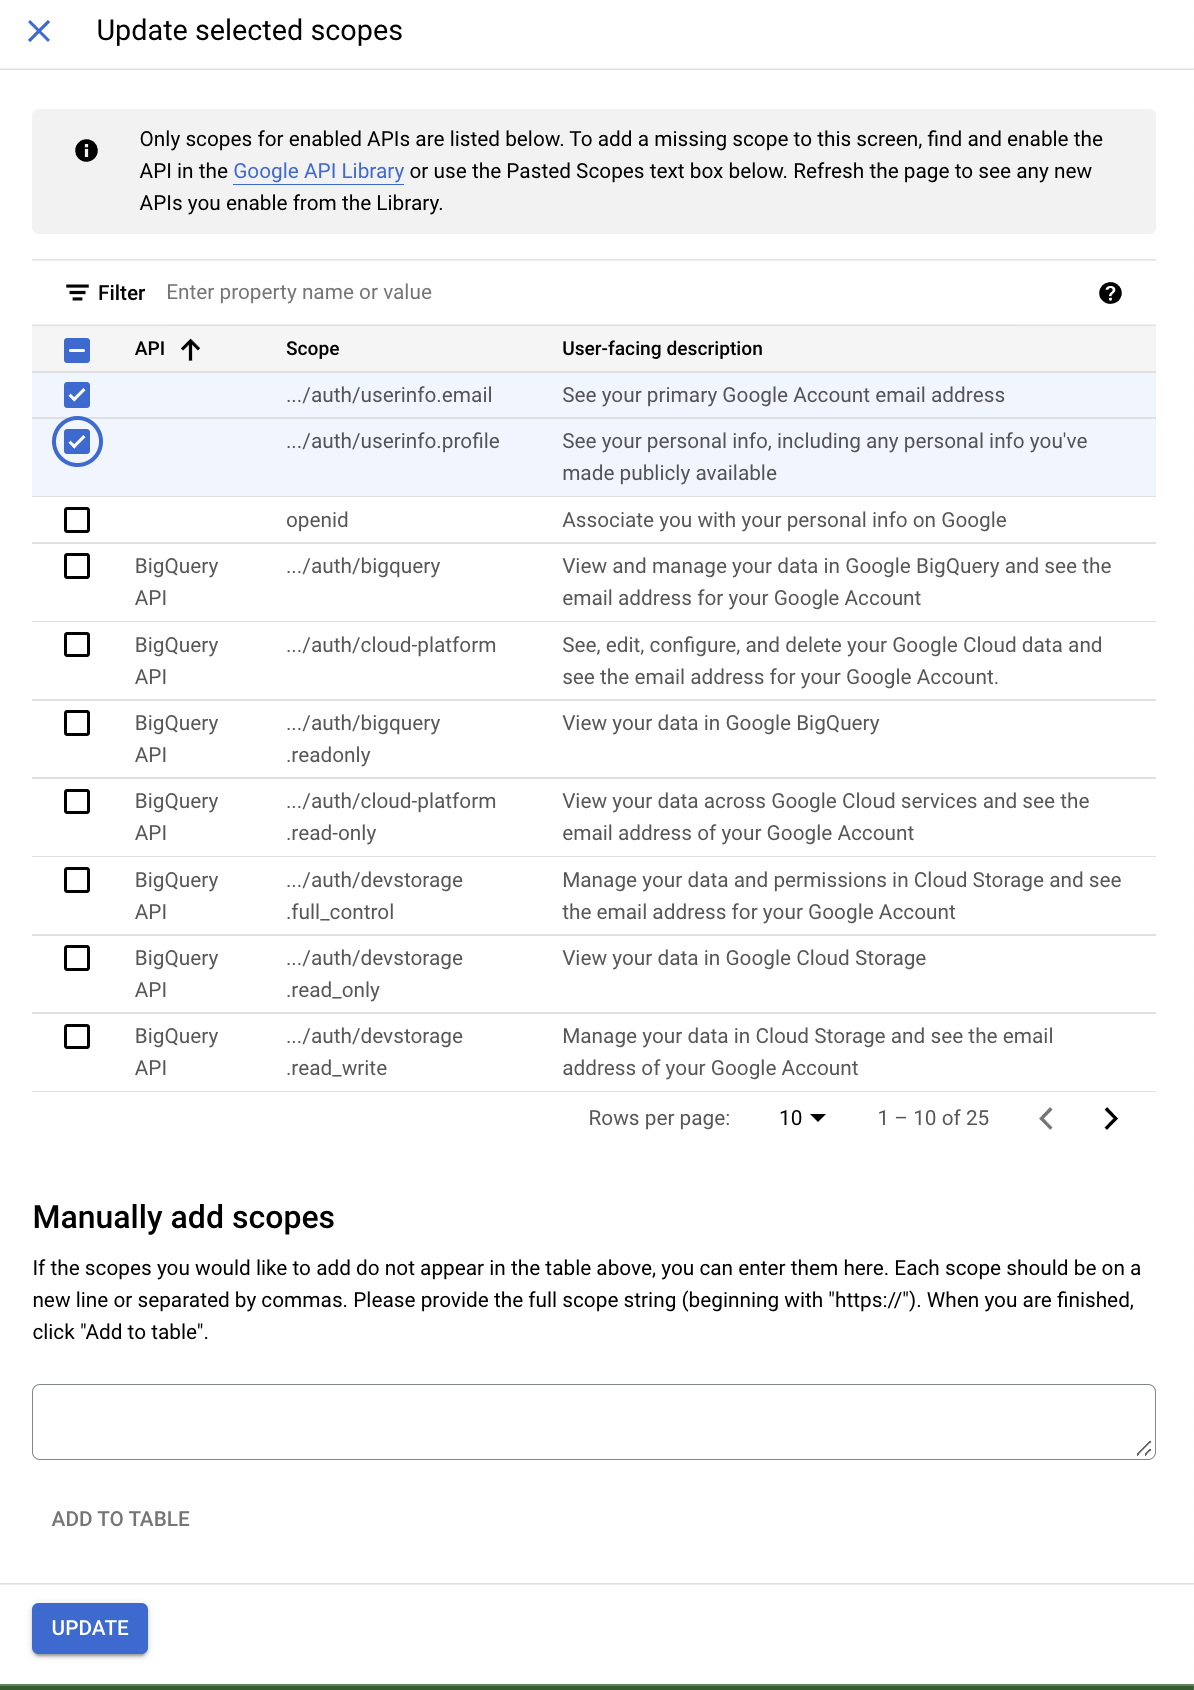
To add a basic scope, click “Add or Remove Scopes” which brings up this page:

You can click to select the first two basic scopes; that should be sufficient. Then click the Update Button:
It should then look like this after updating:
Test Mode vs. Production Mode
There are two possible modes for a Google OAuth Application
| Mode | Protocols Allows | Users Allowed |
|---|---|---|
| Test Mode | http or https | Only a specfific subset which must be specfied in the OAuth Consent Screen settings |
| Production Mode | https only, except for localhost | Any user with a Google Account (with an option to restrict to only @ucsb.edu users |
For this course, we typically prefer Production Mode.
You change from Test Mode to Production Mode by navigating to the Audience tab on the left side of the screen, clicking the Publish App button, followed by Confirm

That should change the screen to look like this.
What’s next
A typical next step is to set up a Google OAuth app so that you can obtain a GOOGLE_CLIENT_ID and GOOGLE_CLIENT_SECRET values, as described here.