This article will show the process of setting up a MongoDB Datbase, which holds MongoDB Collections.
First, some basic terminology:
- What we call a “table” in an SQL database is called a “collection” in a MongoDB database.
- What we call a “row” in a table in called a “document” in an MongoDB database.
But, unlike a row that has specific fields (columns), a document in a MongoDB database is essentially a JSON object stored in the cloud; thus it can have arbitrarily deep nested structure.
Also, note the following hierarchy that is used on https://cloud.mongodb.com. Each level in the hierachy can have multiple items at the next level down, i.e. an organization can have many projects, a project can have many databases, a database can have many collections, and a collection can have many documents.
- Organization (e.g.
ucsb-cs156-w22)- Project (e.g.
demo-mongodb-project-01)- Database (e.g.
database01)- Collection (e.g.
reddit_posts)- Document (e.g. the JSON representation of a specific reddit post, e.g. )
- Collection (e.g.
- Database (e.g.
- Project (e.g.
Once you have navigated to an organization and have created a new project, you’ll see this screen where it is possible to create your first database.

If you already have a database created, instead, you’ll see a page like this, with the Create Database button at the upper right:
The next choice you need to make is what kind of deployment. Clearly, we are going to choose the FREE option for this course, but if you are building something for your own use, and are prepared to pay for it, you might make a different choice.

The next choice you will make is which cloud provider to use, as well as various other options. I suggest taking the defaults. (It could be argued that there might be some marginal benefit to using us-west-2 instead of us-east-1, just because of geographical proximity to California, and if you have a reason to prefer Google Cloud or Microsoft Azure over Amazon AWS, feel free.)
After taking the defaults (or configuring to your hearts content), click the green “Create Cluster” button.

The next choice involves some security choices; you are asked to create a username and password.
- This username/password will be put into configuration files such as
.env, so it is important to NOT use a password that you use for other applications, and it does NOT need to be a password that you can remember and type. - Therefore, do not think in terms of a personal username and password such as
cgauchoandcutePuppies@23 - Instead, think of a functional username such as
readOnly01orreadWrite07. - Let the the
Autogenerate Secure Passwordbutton select a password for you.

Enter a username (we suggest readWrite01 as your first username), click Autogenerate Secure Password, then click Create User:

Then, you’ll see a result like this one:

At a later stage, we’ll use those credentials to connect to the database. Don’t worry about copying down the password now.
The next step involves setting up network access. Fill in the box with 0.0.0.0/0, which is a way of specifying “Any IP address at all”, i.e. any host anywhere on the internet.
From a security standpoint, this is not ideal; in a real world situation, we would want to be much more specific about which IP address ranges have access to our MongoDB database. Unfortunately, the reality for students and professors is that:
- For localhost access: we work from campus, we work from home, we work from coffee shops: and the IP address range of our laptop is not very predictable.
- For Heroku access: even here, on the free plan, the IP address range is not very predictable. (On paid plans, you can solve this.)
So, regrettably, for convenience, I suggest going with 0.0.0.0/0 here. Just be advised that if, in later life, you are securing a database in a situation where the client has resources to pay, that there are ways of ensuring that you have a stable address range (e.g. using a VPN for your laptop, and using a paid cloud hosting plan where the IP address range is predictable and stable.)

After entering 0.0.0.0/0 and Anywhere, and clicking Add Entry, it should look like this:

At this point, you may click Finish and Close. That will bring up this Modal:

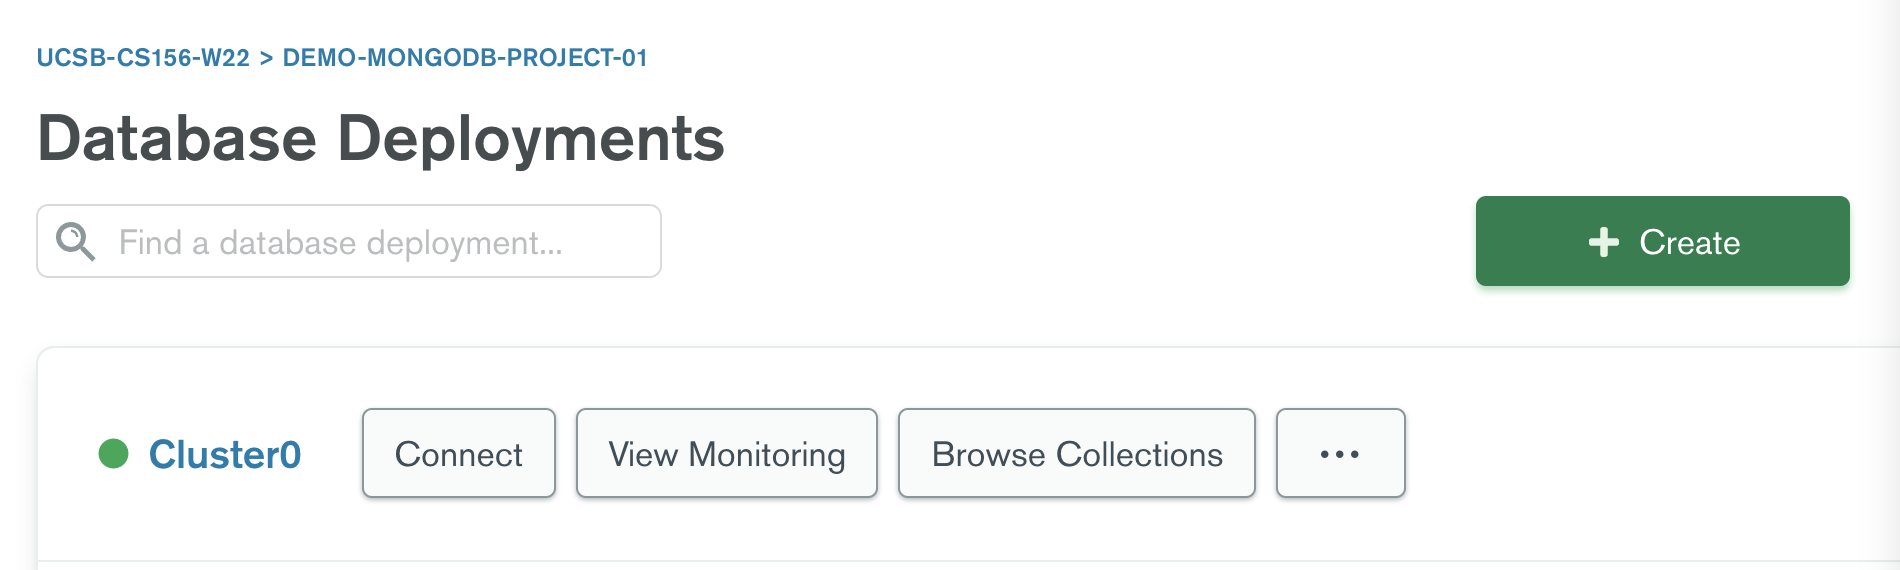
Clicking the “Take me to Database” brings you to this screen. The terminology may be a bit confusing, but Cluster 0 is your Database deployment, i.e the place where your Database lives in the cloud.

Click on the blue text that says Cluster 0, and you land at this page:

The Collections tab is the place where we start to define collections and enter some data. So click on the Collections tab:
The first time you land there, it will look like this:

Choose “Add your own data”. That will prompt you with this Modal:

Enter these values:
- For
Database, let’s keep it simple: we suggestdatabase. If you need more than one database per project, you can come up with a better naming convention then, e.g.proj1db,proj2db, etc. - For
Collection, enter the name of the first collection you want to create.- For this example, we’ll use Reddit posts as our data (because it is relatively easy to get JSON data from Reddit).
- So, for this example, we’ll enter
postsas the name of the collection. - If you were storing data for courses, you might use
coursesas the name of the collection.
- Usually, do not check
Capped Collection- The only exception woudld be if there is a case where you want a collection that keeps only the most recent 5MB worth of data, for example, and the oldest data should automatically be deleted.
- An example would be “log data” of some kind, where you always want to keep the most recent few days or weeks of data, but you don’t want the collection to grow arbitrarily large.
- There is more information here: Capped Collection Documentation
Enter these values then click Create:

Your Collections tab now looks like this:

We are now ready to start setting up access to the collection from Java code.
We’ll do that in a separate article.